Thin Client


Watts Water Technologies needed to replace 1000 old shop-floor terminals with more flexible desktops. They ended up choosing SUSE Linux Enterprise Desktop on Neoware thin client hardwares along with ZENworks to help manage the environment. You can also check out the Open PR blog entry for some info.  From the customer success story…

After evaluating several desktop and thin-client solutions, Watts Water Technologies selected SUSE Linux Enterprise Desktop for use in a thin-client deployment, as well as Novell ZENworks to manage more than 1,000 desktops.

“Linux really shines and Novell has a great Linux strategy,” said Ty Muscat, Data Center Manager for Watts Water Technologies. “We have almost every platform imaginable and are moving more and more to SUSE Linux Enterprise desktops and servers. We like having an open platform with a lot of flexibility.”

The results:

“Without Novell, we would have had to invest far more to get anything similar to what we have with SUSE Linux Enterprise Desktop,” said Muscat. “The ongoing management and maintenance costs of other options would have been overwhelming for us.”

Starting off our new series called Vendor Spotlight is a company that I think is doing some very cool things, ThinFusion Inc. The interview was conducted by phone and included Brandon and Rick Vancleeve

What is ThinFusion?

ThinFusion is the combination of a Linux OS platform running in a thin client environment, while providing access to the majority of Windows-based applications. ThinFusion uses either a thin client OS local, paired to a session on a ThinFusion server, or alternatively allows the use of cross-platform client software to provide secure and very speedy access to the ThinFusion Server session literally from anywhere.

ThinFusion provides a single access point to all the Linux and Windows applications that a user needs. The administrative interface allows for simple drag and drop granting and revoking, in realtime, of access to applications on a group or individual level.

What applications can I run on ThinFusion?

This part is easy…
Since it accesses a Windows Terminal Server for Windows apps you can go to Microsoft’s site and find every supported program out there. You don’t have to go through a giant bug list of “quirks” when running Windows apps in a Linux shell. If it runs in a Terminal Server environment, it runs on ThinFusion.

On the Linux side, since you are in essence just accessing a Linux Desktop you can run all your Linux applications.

Who is ThinFusion Inc?

ThinFusion Inc, is a small company in the Mountains of Montana that have developed ThinFusion to meet the needs of K-12 Schools, Higher Ed, and Small to Medium Businesses. ThinFusion mission statement: Access your classroom from anyplace anytime.

What is a typical customer for ThinFusion?

The typical customer would be a school or business that has a need to control access to applications, reduce administrative and technical support costs and increase the quality of service for its users while maintaining the necessary security and controls.

What is a sample use case of ThinFusion?

A school district with a Laptop lab is an excellent use case for ThinFusion. Typically in this environment the Laptops would be running Windows with most applications installed locally. Often the students are issued the laptops and are responsible for physical security and transport, often including off school property and for all purposes becoming the students main machine for home and school. Such an environment has multiple risks and costs associated with it, including re-imaging regularly due to misconfigurations, virus and spy-ware issues and either malicious or inadvertent deletions and changes to the software.

Particularly if the laptops are issued and kept by the students does the risk of virus infection or inadvertent misconfiguration crop up, the possibility of infection and transport of the viruses and spyware becomes a virtual certainty, with some school environments literally being taken down for periods of time from such infections.

ThinFusion in this environment would remove most or all of the issues discussed. Two choices are possible:

1. Install a very slim Desktop Linux with NX Client software on the student laptop, all application access requires dialup or better Internet access to the ThinFusion Server, thus all applications are run in a very secure and less virus-prone environment.
2. Install Windows or keep the current Desktop OS, adding lockdown software and the NX Client software, requiring dialup or better Internet acccess to the ThinFusion Server etc.

Both of the above examples allow students and staff to securely access their school network just as if they were sitting at a desk in class, from anywhere/anytime. It extends the learning environment beyond the walls of the school, and it allows for collaboration beyond the bus bell. This is the mode that we see businesses transitioning to at record pace, as we see more and more workers using home offices and accessing data through secure remote scenarios.

This environment is effective for students and teachers, with teachers mostly falling into the category of # 2, they having the most need to run 3rd party applications that are typically Windows-based.

What are the support options?

A ThinFusion subscription comes with a full support, training and installation package. Higher levels of support packages are available.

What should you not use ThinFusion for?

ThinFusion is not a great solution for high end multimedia, neither for creation nor viewing. A class of 50 users running a very graphically oriented courseware would be fairly choppy.

How do I learn more about ThinFusion?
Please visit their website (www.thinfusion.com), to experience demonstrations, tutorials, case studies and more. You can also reach them by phone at 1-800-432-0346.

==========

If you can think of an example of a vendor that is going something you can really appreciate and is good for the community, put a comment in or email me: rbrunson[at]novell.com

Enjoy,

RossB
Pre-eXecution Environment (PXE) is a method of booting computers off of a network card independent of local storage devices such as a hard drive or a DVD. PXE is very useful in thin client environments or as a quick way to deploy a new operating system to any computer. PXE is dependent on several network protocols:

  • IP: A network layer protocol in the Internet Protocol Suite. IP provides the service of communicable unique global addressing amongst computers.
  • UDP: A core of protocol of the Internet Protocol Suit. UDP allows programs to send short messages sometimes know as datagrams.
  • DHCP: A method for networked computers to obtain IP addresses and other necessary networking parameters.
  • TFTP: A simple file transfer protocol that can be implement in a very small amount of memory

Setting up a TFTP server will allow you to easily deploy operating systems to machines without having to boot them from a CD or a DVD. Since most, if not all, laptops have an auto-sensing NICs these days, it is very convenient to setup a TFTP server on your machine. This will allow you to connect your laptop to another machine by a standard Ethernet cable and deploy a new operating system. If your machine doesn’t have an auto-sensing nic you can use a ethernet crossover cable or a switch/hub.

All of the components required for setting up a TFTP server are included in SUSE Linux Enterprise Server (SLES). While unsupported, you can install the necessary component packages from SLES on a SUSE Linux Enterprise Desktop (SLED).

A TFTP server requires the following things:

  • A dhcp server
  • Atftp (I prefer atftp because of advanced features and support for KIWI)
  • An installation source. This can either be an image that you created using KIWI or in the case of this article a SLED DVD or ISO.
  • A method of serving the installation source, in this case Apache.

DHCP. Before a PXE booted machine can do anything it needs to get an an IP address. This means you must setup a DCHP server. Go into the YaST Software Management module and install the “DHCP and DNS Server” pattern. This includes dhcp, dhcp6, dhcp-relay, dhcp-server, dhcp-tools. Next configure your /etc/dhcpd.conf file. Here is what mine looks like:
default-lease-time 14400;
ddns-update-style none;
subnet 192.168.2.0 netmask 255.255.255.0 {
option domain-name-servers 192.168.2.50;
default-lease-time 14400;
filename "pxelinux.0";
next-server 192.168.2.50;
max-lease-time 172800;
range 192.168.2.51 192.168.2.160;
}

The key values for PXE booting are “filename” and “next-server”. Pxelinux.0 is a SYSLINUX derivative, for booting Linux off a network server, using a network ROM conforming to the Intel PXE specification. We will discuss more in a bit. For more information visit here. Next-server defines the ip address of the TFTP boot server. In this case the DHCP server and TFTP server are running on the same machine. Next we will have to configure a static IP address on our machine so that it matches the next-server value. In this example that address is 192.168.2.50 and the subnet mask is 255.255.255.0. To setup a static IP address go into yast and choose the “network card” module. Restart or start your dhcp server by running rcdhcpd start or rcdhcpd restart

ATFP: There isn’t much that needs to be configured beyond the defaults. Here is my /etc/sysconfig/atftpd file:

## Path: Network/FTP/Atftpd
## Description: ATFTP Configuration
## Type: string
## Default: "--daemon "
#
# atftpd options
#
ATFTPD_OPTIONS="--daemon --no-multicast" #I use --no-multicast to increase reliability of blasting down KIWI images, but it is not necessary

## Type: yesno
## Default: no
#
# Use inetd instead of daemon
#
ATFTPD_USE_INETD="no"
## Type: string
## Default: "/tftpboot"
#
# TFTP directory must be a world readable/writable directory.
# By default /tftpboot is assumed.
#
ATFTPD_DIRECTORY="/tftpboot"
## Type: string
## Default: ""
#
# Whitespace seperated list of IP addresses which ATFTPD binds to.
# One instance of the service is started on each IP address.
# By default atftpd will listen on all available IP addresses/interfaces.
#
ATFTPD_BIND_ADDRESSES=""

Note that the default location of of the ATFTP directory is /tftpboot. Start/restart ATFTP by entering atftpd start or atftpd restart

/tftptpboot is the directory where you store all the files necessary for PXE booting a machine. My /tftpboot directory contains the following files and directories:

-rw-r--r-- 1 root root 13148 Jul 11 06:35 pxelinux.0
drwxr-xr-x 2 root root 4096 Sep 24 16:33 pxelinux.cfg/
drwxr-xr-x 2 root root 4096 Jul 11 06:36 sled10x86/

Let’s address each of these files and directories individually.

pxelinux.0: We addressed this file previously in the dhcp section. You can get this file from /usr/share/syslinux/pxelinux.0

pxelinux.cfg: This directory contains a file named “default”. Here is the contents of my default file:
prompt 1 #this will bring up a boot prompt on the PXE booted machine and force the user to enter the label of the system they want to boot into. This a a good way to prevent people from accidentally blowing away their computer.
# sled10
label sled10 #enter this label (sled10) into the boot prompt
kernel /sled10x86/linux
append initrd=/sled10x86/initrd install=http://192.168.2.50/install/sled10x86 splash=silent showopts

By utilizing “prompt 1” you can setup several different installation environments (SLES, SLED, openSUSE, SLE ThinClient etc.) To do this add multiple enteries. Each entry should point to the correct initrd, linux and installation source for that system. Each label should be unique.

sled10x86: This directory contains two files:

  • initrd
  • linux

You can get these files off of the SLED or SLES installation dvd in /media/boot/i386/loader/. Simply copy over the initrd and linux files to your /tftpboot/sled10x86 directory.

Installation source: As seen in the /tftpboot/pxelinux.cfg/default file we point to an installation source hosted on the same machine (install=http://192.168.2.50/install/sled10x86 splash=silent showopts)

  • Open up the “installation Server” yast module
  • Choose the appropriate protocol (in this case http)
  • Select a directory where you want to keep your installation source (in this case /install/).
  • Choose an alias for your directory (install)
  • Click Finish
  • Copy over the contents of SLED or SLES iso or dvd to the directory you just specified.
  • Check and make sure you can browse to your source through firefox

At this point you should be able to pxe boot a machine off of your laptop or desktop. Make sure that the machine to be PXE booted supports PXE and has it enabled in the BIOS. Some computers will refer to it as “network boot”. On most machines hitting F12 after powering on will force the machine to PXE boot. After the machine PXE boots enter “sled10” at the boot prompt, hit enter, and then go forward with your installation.

Go Phillies!

As you may have heard, Citrix recently decided to aquire XenSource (more here, here and here) – the commercial front on the Xen virtualization technology in SLES 10. InfoWorld’s David Marshall reviews some interesting perspectives on the Citrix aquisition of XenSource in this audio podcast. He reviews a brief Q&A session with Citrix execs and a blog entry from Barrons.comAs I suspected when I first heard the news, it looks like Citrix’s initial foray into virtualization will be related to the desktop virtualization market. Still, $500M smackers is a pretty steep hill to climb to profitability if you ask me. Maybe I’ll be proven wrong.

Are any of YOU considering a desktop virtualization initiative? Why or why not?

[NOTE – If you listen to podcasts regularly, you know that it’s common practice to have some intro music. When listening to this podcast, just note that the music (annoying as it may be) doesn’t stop. Oh boy! David, if you end up reading this… next time, could… you… please… speak… a… little… faster…? 🙂 ]

Seems that Citrix just announced they will purchase XenSource, the commercial entity formed to make money off of the Xen Virtualization open source project.

I’ve read all I can about it, I just don’t see the “synergies” that are supposed to be there, it just doesn’t make much sense.  Of course Xen is an open source project and the vast majority of development takes place at Novell, other distributions and independent developers, so XenSource’s acquisition may not affect much other than Citrix’s stock price.  Also anyone who has purchased the Xenterprise product (XenSource’s commercial Virtualization Server offering) is probably trying to figure out how to download SUSE Linux Enterprise Server 10 SP1, (hint: just click on the link, it’s really easy to set up and run, we know that for a fact).

Should be interesting to watch this one!

RossB

It was only a matter of time before the enterprise Linux desktop market started to get its due credit, IMHO. Note, that while today’s announcement with Lenovo and Novell is related to a PRE-LOAD of Linux, SUSE Linux Enterprise Desktop has been a certified and supported Linux platform for notebooks and desktops from the major hardware manufacturers for quite a while now…

…and there have even been several lesser-known brands (white box) and other web sites willing to pre-load SLED for you. Read the original October 2006 press release here. What other organizations have I missed (big or small)? Let’s get them all listed here if we can… (ie, post a comment)

Interested in becoming a system builder yourself? Check out the Novell Partner program.

In keeping an eye out for what’s new and happening, I continue to hear more about people using VDI, or Virtual Desktop Infrastructure for various purposes, including security, management of intellectual property, ease of providing access, etc.

I have a number of customers who use VDI for various purposes, but the most prevalent one is to make sure that data does not make it’s way to the actual desktop of the user, in particular programming for financial applications and other situations where the IP can’t get sent over IP, if you know what I mean.

SearchServerVirtualization has a well-done article that explains a lot about Desktop Management challenges and solutions, a good read if you’re still trying to figure out what VDI is all about.

Enjoy,

RossB

This is a very exciting development… While we have been working with Wyse and have done some nice work in getting SUSE Linux Enterprise to run on several thin client platforms (including those from Wyse), an announcement was made at Linux World which formally announces support for this configuration.

You can see the Wyse press release here and a related article from LinuxDevices here.

With this partnership, customers who prefer Linux can now deploy a thin computing environment that leverages a standard operating system throughout the enterprise with a consistent, rich user interface. As a result, customers can realize lower operating costs, increased data security and dramatically improved manageability. Wyse customers are today using SUSE Linux Enterprise on Wyse thin clients in limited installations.  (from the Wyse press release)

For thin client devices you have several options of OS… including “dumbed-down” versions of Windows, Wyse’s own flavor of Linux, and now SUSE Linux Enterprise.  Why would someone consider SUSE Linux Enterprise over Wyse’s own flavor of Linux?  We’ll answer that question in an upcoming post.  Stay tuned…

What is a Desktop?

When we think about a desktop, various things come to mind, a mini-tower machine sitting next to a monitor on your actual desktop, a set of applications running on an Operating System that you use to get things done, and (if you are me) either GNOME or KDE on a Linux System.

Will Google Do _____ ?

Rather all or any of the above come to mind when you heard Desktop, it’s important to note that there have also been long-standing rumors that someone like Google will be doing A) Google-branded Linux Distribution (Googlix, anyone?) B) Giving out free desktop machines with someone’s distribution on it all branded neatly with Google or C) Google somehow putting all the apps that one could ever need into the browser experience and taking over the Desktop market by neatly snaring everyone the moment they want to do something.

I’ve often wanted to know if there is a correlation between Google product announcements and the amount of people who experience severe heartburn at Microsoft’s various consumer-focused divisions. Perhaps a Google Maps mashup of the Seattle area and the sales of Pepcid AC at the local convenience stores would be informative….

The Community Gets Involved

Recently the GNOME developers were presented with the idea of an Online Desktop, not a “WebTop” where everything is run off the web, but something that could be a desktop replacement in every important way, you could boot off a Live CD/DVD or just get access to the web from any machine that can load a browser and supports open protocols.

This really opens up a lot of ideas, questions and suggestions, such as what if all we had to do was get to the web, and when we logged on to our “Online Desktop” we had access to an initial template desktop framework, and all sorts of good and useful plugins and addons were just a few clicks away? We already have this with tools like Flock, albeit in a browser context, or some of the flash-based online desktops such as Magix, DesktopTwo and Goowy.

Asking the Tough Questions

So the concept might look good, but some real questions need to be answered or considered for this to even begin to be useful:

Q) Will you be able to use any machine and browser that has broadband access to start and use the Online Desktop?

Q) Where will the data that you generate reside, who will back it up, and what happens if something needs to be restored?

Q) Will you have access to only the resources of the Online Desktop, or will you be able to use local machine resources too?

Q) Will there be P2V tools, or how do I get all my local data into the Online Desktop (Cloud), will there be tools or just HTTP uploads like Flickr/file attachments?

Q) Who is the real target market for the Online Desktop? Emerging Markets would seem to be one, but the very fact of it being an emerging market (low or no bandwidth available, extreme conditions, power issues, legacy or incompatible machines) makes that a tough sell.

Q) How about a disconnected mode? Does the very fact that I have a laptop and want to work on the plane or sitting in a deck chair next to the hotel pool mean that I would have a more complex arrangement than what I have now?

Q) How will apps have to be designed and to what specs must they adhere to be a part of the Online Desktop that we eventually get? Hopefully this will happen cross-vendor and cross-community, that way we get extreme interoperability, and not the impending Train Wreck that I see happening with Microsoft’s Windows Live scenario.

The REAL Question

Would you do it? Do you think the ultimate market is as a secure-protocol thin client that lets you access your corporate applications from literally any system in your or other environments? How much data (files, email, MP3’s etc.) do you treat as your “Daily Data Set” and would you ever trust a vendor or set of vendors to house that data, given that crackers/hackers will begin to try to get access to it?

Bottom Line

Is the concept of an Online Desktop the real goal, or would you rather have seamless data synchronization across all platforms and all flavors of operating systems?  Then would it really matter what you used?

Enjoy,

RossB

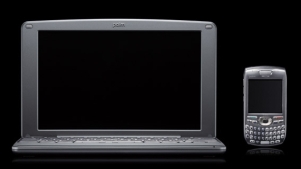
Whatever you call it, the Palm Foleo is one light and small device, running Linux and with all the apps instantly available, it’s likely replace a lot of laptops for harried road-warriors.

Sascha Segan of Gearlog got to go hands on with the device and found:

“As I noted in our original piece on the Foleo, it comes with stripped down Microsoft Office applications courtesy of Dataviz DocumentsToGo, a file manager, a photo viewer, a PDF reader, an e-mail program, the Opera web browser, and, excitingly for Linux geeks everywhere, a terminal program that falls down into the Bash shell. More apps are coming from third-party developers, and excitingly, Palm reps said the processor is indeed fast enough to play video.”

palmfoleo.jpg

Henry Kingman of Linuxdevices.com also got a chance to fondle look at a Foleo and reports that it features:

  • Battery life “according to Q/A, not marketing,” under constant use with WiFi on and the screen set to the default (65 percent) brightness is an honest five hours.
  • It has a real bash shell, because bash’s built-ins reduce process loading (forking) at boot time, for faster start-up.
  • The magnetically latched case is grippy rubber with undulations — very easy to carry.
  • The keyboard conforms to the smaller ISO standard, with 18mm pitch.
  • All apps run all the time, and only run maximized to full-screen. Switching between them (via a hardware key) is instantaneous.
  • …Plus a lot more, read his article above.

You can read Sascha’s original article about the product and of course visit the Palm site for more formal information about the Foleo.

Enjoy,

RossB

Located adjacent to the Mainline Information Systems headquarters, Staybridge Suites Hotel of Tallahassee is one of the first hotels to offer thin-client workstations in all of its 104 rooms.  The goal being to give guests an alternative (and easy to manage) way of accessing the Internet even if they didn’t happen to bring a laptop with them.

Although MS Windows was evaluated as an option, it was deemed cost-prohibitive.  The solution was to provide a virtual session of SUSE Linux Enterprise Desktop (SLED) to guests on demand at a fraction of the cost.  The solution was built using a combination of IBM blade servers, Devon thin client devices, VMware VI3, and of course SLED.

More details are available in this Novell success story and this Mainline success story (pdf).

Novell has done a lot of work to expand the the use cases for SUSE Linux Enterprise Desktop. Today SLED can be deployed in a number of ways from a fully locked down kiosk to a full blown laptop for general knowledge workers. Locked down environments are particularly useful in thinclient computing models.

One of the most compelling reasons to deploy SLED over a proprietary desktop is the ability to lock it down at a very granular level. This means that you have the ability to lock down desktops so that EVERYTHING is locked down, or just a few things.

There are a number of tools included in SLED to lockdown the desktop. In this article we’ll discuss how to manually lockdown the desktop using:

  • Gconf
  • Permissions and groups
  • Removal of programs and modules
  • Configuring files/settings

GConf is a system used by the GNOME desktop environment for storing configuration settings for the desktop and applications. Each user has a .gconf directory stored in their home directory that stores their individual settings. There is also a global gconf directory located in /etc/opt/gnome/gconf/. Administrators can mark settings as “default” or prevent users from changing the settings by marking them as “mandatory”.

There are several lockdown options stored in GConf. There are two great tools to configure GConf keys, gconf-editor and gconftool-2.

  • gconf-editor (/opt/gnome/bin/gconf-editor) is a graphical tool that allows you to change local gconf keys or set global mandatory/default keys.
    • To set a key as mandatory or default, open gconf-editor as root, navigate to the key you want to set, right click on it and choose to set as mandatory or default.
    • You can search for gconf keys by going to the edit menu and choosing “find”.
  • gconftool-2 (/opt/gnome/bin/gconftool-2) is a command line tool which allows you to modify gconf settings. It be used in creating a script to lockdown desktops as part of an automated/scripted deployment.  Gconftool-2 is also very useful when writing scripts to build and lockdown KIWI based images.  Listed below is an example of the syntax for changing a key which has a boolean key:
    • gconftool-2 –direct –config-source xml:readwrite:/etc/opt/gnome/gconf/gconf.xml.mandatory –type bool –set /apps/metacity/general/reduced_resources true
    • Here is the syntax for setting a string gconf key:
    • gconftool-2 –direct –config-source xml:readwrite:/etc/opt/gnome/gconf/gconf.xml.mandatory –type string –set /apps/metacity/window_keybindings/begin_resize disabled
    • Note how both keys being modified are in the gconf.xml.mandatory directory. To make a key default rather than mandatory switch gconf.xml.mandatory to gconf.xml.defaults.

GConf Schema is broken down into 5 main categories: apps, desktop, schema, schemas, and system. As far as lockdown is concerned the main categories of interest are apps and desktop. Listed below are some important gconf keys which you can modify to customize and lockdown your desktops. Remember that these keys can be set as default or mandatory for users.

  • /apps/gnome-screensaver/idle_activation_enabled –This will force the screen saver to come on when the session is idle
  • /apps/gnome-screensaver/idle_delay –The number of minutes of inactivity before the session is considered idle.
  • /apps/gnome-screensaver/lock_enabled –Set this to TRUE to lock the screen when the screensaver goes active.
  • /apps/nautilus/preferences/show_desktop –If set to true, then Nautilus will draw the icons on the desktop. If false the user will not be able to interact with the file system through the Desktop.
  • /apps/panel/global/locked_down –If true, the panel will not allow any changes to the configuration of the panel. Individual applets may need to be locked down separately however. The panel must be restarted for this to take effect.
  • /desktop/gnome/applications/main-menu/lock-down/search_area_visible –set to true if the search area should be visible and active.
  • /desktop/gnome/applications/main-menu/lock-down/user_modifiable_apps –set to true if the user is allowed to modify the list of user-specified or “Favorite” applications.
  • /desktop/gnome/background/picture_filename –File to use for the background image
  • /desktop/gnome/lockdown/disable_command_line –Prevent the user from accessing the terminal or specifying a command line to be executed. For example, this would disable access to the panel’s “Run Application” dialog.
  • /desktop/gnome/lockdown/disable_printing –Prevent the user from printing. For example, this would disable access to all applications’ “Print” dialogs.
  • /desktop/gnome/lockdown/disable_print_setup –Prevent the user from modifying print settings. For example, this would disable access to all applications’ “Print Setup” dialogs.
  • /desktop/gnome/lockdown/disable_save_to_disk –Prevent the user from saving files to disk. For example, this would disable access to all applications’ “Save as” dialogs.
  • /desktop/gnome/remote_access/ –There are a number of settings in this directory for configuring remote access through vnc.

There are many other useful keys and some new ones we have introduced in SLED 10 SP1. I suggest that you spend some time browsing through gconf with gconf-editor. Each key has a “description” associated with it that will give you some info on what it does.

Permissions and Groups is another useful way of locking down Desktops. You can modify permissions on particular applications so that only users who are in a specific group can have access to it. In the example Below I show you how to change permissions on Firefox and GnomeTerminal so that user1 can use firefox and gnome-terminal, but user2 can only use gnome-terminal.

#Here I create two groups
groupadd gnometerminal -g 203
groupadd firefox -g 204

#Here I assign local users to the appropriate group or groups
usermod user1 -A gnometerminal,firefox
usermod user2 -G gnometerminal

#Here I change the ownership of the applications to lock out others from accessing it and changing it.
chown root:firefox /usr/bin/firefox
chown root:gnometerminal /opt/gnome/bin/gnome-terminal

#Here I change the permissions of the applications to lock out others from accessing it and changing it.
chmod 754 /usr/bin/firefox
chmod 754 /opt/gnome/bin/gnome-terminal

Another way to lock down the system is by removing components. The easiest way to prevent users from using certain applications is by not installing them in the first place. You can remove applications by using the YaST software management module or by using the rpm -e command.

You can further lockdown the system by removing certain kernel modules. By removing the following module you can prevent the system from recognizing USB mass storage devices (like flash drives, usb drives, iPods etc.), but still use USB keyboards and mice.

/lib/modules/2.6.16.46-0.12-smp/kernel/drivers/usb/storage/usb-storage.ko (you can use the uname -r command to determine which version of the kernel you’re using).

While you can use gconf to prevent users from getting to terminals installed on the system you need to configure /etc/X11/xorg.conf to prevent access to virtual terminals. In the “ServerLayout” section add the following lines to prevent users from switching to a virtual terminal and to prevent them from killing X by typing ctrl-alt-backspace:

Option DontVTSwitch True
Option DontZap Yes

This article only shows a small subset of the lockdown functionality of SUSE Linux Enterprise Desktop, but it should get you well on your way. Have a lot of fun!

I know that more and more organizations are looking for ways of being a little more eco-friendly, a little more environmentally responsible, and even saving a little on the electricity bill. This ZDnet article entitled “Support grows for thin-client computing” mentioned an interesting perspective on the benefits of thin client models… Power savings. Specifically, it was this passage:

Another benefit, according to Sean Whetstone, head of IT at Reed Managed Services, is the thin-client model can be far greener — ticking an important box on the current corporate agenda. Whetstone, also looking after a 3,500 employee-strong company, previously had desktops running 24/7 “in case some Microsoft update had to be pushed out”. Moving to a model that will see around 98 percent of PCs replaced with thin-client terminals means those updates are centralised and the terminals are not only using less power anyway but are on for only around 10 hours per day. Whetstone says this measure has been a considerable step in helping Reed hit its objective of being a carbon-neutral company.

Thin client hardware can be smaller, consume less power, and run cooler (less AC required). On top of all the manageability and security benefits that thin clients provide. So it does make sense that there could be some savings to be had there.

SUSE Linux Enterprise Desktop / SUSE Linux Enterprise Thin Client can help with that solution as well… by lowering your up-front costs and providing you with a secure and reliable platform on the leading thin client hardware vendors. Not 100% of your environment needs to be thin client, but every little bit will help save you BIG $$$ in the long run.

Contact us if you’re interested in learning more.

The folks over at GravityZoo have posted about their project to wrap the GravityZoo framework around OpenOffice.org, effectively making it possible to run OO.o completely in an online mode, no installation or updates needed on a local client.

The mind reels at the possible implications of a totally free and accessible online version of OpenOffice.org! (Oh, and I do know about Thinkfree Office, we even blogged about it recently.) What will happen if you can simply connect from any machine in a cyber-cafe or public terminal and continue work on your Great Trans-Continental Novel or Expose of The Great Harm whenever and wherever you want?

The possibility of use in emerging markets is another very interesting concept, with the OLPC (One Laptop Per Child) program about to distribute a large number of Linux-based machines to the rest of the world.   Having an online version of an Office-like suite would make backing up, data-retention and disaster-recovery scenarios much less complex, at least from a local user point of view.

What uses can you come up with for an online version of OO.o? Would you use it more or less than a local version? What information would you make available to get a free account and a certain amount of storage on someone’s server so you could access this everywhere? (I assume that is how it would work).

We all love the openSUSE KIWI build system because it’s a powerful and flexible way to build thin client images (or images in general). That being said, there are a number of different moving parts and it’s easy to miss something. In this article I’ll give you some KIWI troubleshooting techniques.

Here are a list of the key KIWI related files. Make sure that you’ve configured all of them.

  • Your kiwi build directory. This directory can be placed anywhere on your system and includes the following files
    • config.xml (This file is very important. It lists the name of the image you’re about to create, whether or not to use compression, size of the image, package repository(s), local users and packages to be included in your image.)
    • build.sh (If either Jason, Atiq or I have built you an image there’s probably a script named build.sh that automates the whole process. The script will automate the running of kiwi -p, copy over the appropriate configuration files and run kiwi -c. This script is not mandatory, but we find that a script like this makes life easier. Guy contends that it is unnecessary and most of its function should be performed by config.sh)
    • config.sh (This is a script that is automatically called after you run kiwi -p. The purpose of this script is to activate services so that they turn on when you boot the system.)
    • VERSION (This file exists in older versions of KIWI. In newer versions of KIWI the image version number is included config.xml)
    • images.sh (This script is automatically called after you run kiwi -c. The purpose of this script is to clean up the image. It uninstalls unneeded rpms, including rpm itself, in order to shrink the image size. It also removes parts of GNOME that aren’t needed and other system files. You can utilize this script to set up groups, change permissions and ownership on files and other things)
  • PXE Booting stuff
    • /etc/dhcpd.conf (Make sure that you have filename “pxelinux.0”; and next-server ipaddress.of.pxe.server; are configured)
    • /etc/sysconfig/atftpd (you must use atftp not tftp)
  • tftpboot directory
    • The default location for your atftp directory is /tftpboot
    • Within /tftpboot you should have the following files/directories
      • KIWI (all uppercase)
        • config.MAC:ADDRESS (Make sure that you have one of these files for each client mac address. I’ve been told that in newer versions of KIWI you can create a file named “default” that will be the default if a config.MAC file is not there for the specific device. Make sure that the letters in the mac address are UPPERCASE. Make sure that the ipaddress inside the config.mac file points to the server hosting the image. Also make sure that the name of the image is spelled right. Also make sure that if you’re using a compressed image you note it here.)
      • image (This directory contains your image and the image.md5. Make sure you have both files. Also after you have run kiwi -c don’t mount the image and mess around with the image and try to regenerate a checksum… it won’t work.)
      • initrd and linux (I’ve blogged about creating these files in kiwi before. You MUST use kiwi to generate these. To learn how click here.
      • pxelinux.0 (You can copy this from /usr/share/syslinux/pxelinux.0)
      • pxelinux.cfg
        • default (Make sure to point to the appropriate kiwi generated initrd and kiwi. Also don’t forget to add kiwitftp=ipaddress.of.server

Here are some more troubleshooting methods for common problems.

The image won’t fit on the flash even though you know it’s small enough: On a small flash don’t use compression. There isn’t enough space to de-compress it.

You have a specific package listed in config.xml, but it’s not showing up in your build: Make sure images.sh isn’t removing it.

You’re having trouble adding a local user in the images.sh script. Don’t try and add users in images.sh, rather add them in config.xml

Kiwi says that that it’s looking for image-name.gz but the image file I generate doesn’t end in .gz. Make sure that your /tftpboot/KIWI/config.MAC:ADDRESS file isn’t marked for compression.

I’m really not sure why it’s not deploying… In /etc/sysconfig/atftpd enable verbose logging. The logs will be written out to /var/log/messages. To enable this make sure the ATFTPD_OPTIONS line looks like this: ATFTPD_OPTIONS=”–daemon –verbose=10″

Everything seems right but the image won’t deploy: I’ve seen some really fast servers (quad core) and some really slow servers (running in a vm on a slow old laptop) get messed up with multicast. Edit your ATFTPD_OPTIONS line so it looks like this: ATFTPD_OPTIONS=”–daemon –no-multicast”.

As I come across other issues I’ll add to this article. If you’ve got your own solutions feel free to post comments.

In order for your machines to PXE boot into the KIWI Build System you need to create a specially made initrd and Linux kernel. To create these files we will utilize Kiwi in similar fashion to the way we build Kiwi images.

Make sure that you have kiwi-desc-netboot-1.20-21.1.i586.rpm installed. This package can be downloaded from here:

http://software.opensuse.org/download/openSUSE:/Tools/SUSE_Linux_10.1/i586/

Enter:

kiwi -p /usr/share/kiwi/image/netboot-suse-SLE10


(‘-p’ tells kiwi to prepare a directory. By default all prepared directories will put in /tmp. Prepared directories will be named kiwi.<random> where <random> is some random string. This is the physical extend.)


Now we need to create a binary from the directory we just prepared. We will also use KIWI to do this. Enter:

kiwi -c /tmp/kiwi.<random> -d /tmp


(where kiwi.<random> is the name of the directory you just prepared. The -c option tells kiwi to create the logical extend. -d tells kiwi where to put the binary(s) you’re about to create.)


This will create 3 files in /tmp that look something like this:

initrd-netboot.i686.gz

initrd-netboot.i686.kernel.2.6-default

initrd-netboot.i686.md5


The one ending in .gz is your initrd. move it to /tftboot and rename it to initrd.

The one with kernel in the name is your kernel. Move it to /tftboot and rename it to linux.


Get pxelinux.0 from /usr/share/syslinux/pxelinux.0 on a running system and put it in /tftboot.


This morning at Brainshare, Novell officially announced our support for thin client devices. The backend for creating these thin images is Kiwi.

Click here for more information about the announcment:

http://www.novell.com/products/thinclient/

From the article:  “By all appearances, the migration from Microsoft Windows to Novell SUSE Linux on the server and the desktop at the Windsor Unified School District in Northern California has been almost as pain-free as any IT professional could hope for.By this summer, all 5,000 students and 250 teachers will be working off of a Linux-based thin client running OpenOffice.org, and the majority of the district’s servers will be running Novell SUSE Linux Enterprise Server.”

More here.

P.S. Sorry for the abbreviated post, on the road and doing this from the BBerry…

You can utilize an AutoYaST config file to to configure and deploy your KIWI image.  For the purpose of citation, following instructions come straight from the lead KIWI developer, Marcus Schäfer.

  • Save your AutoYaST config file as config‑yast.xml into the image description directory at the same level where the config.xml resides.
  • Make sure that YaST is included in your config.xml file and that it does not get removed as part of the images.sh script.
  • If you now prepare/create an image from this description and deploy it yast2 will start at first boot and configure the system.
  • You can utilize this process to configure things like sound, video etc.

The openSUSE KIWI Image System provides a complete operating system image solution for Linux supported hardware platforms as well as for virtualization systems like Xen. KIWI is an ideal solution for creating and imaging thin client devices.

KIWI is a complete imaging solution and can be split up in to three distinct parts.

  1. Physical Extend:This stage “prepares” a directory containing the the contents of your new filesystem based on a software package source (SLED 10) and an image description file (config.xml). In this stage you determine what packages you want installed on your image and what configuration files should be included. As part of the process “smart package manager” will handle dependencies.
    • To “prepare” the physical extend enter: kiwi -p /path
    • /path is the path to the DIRECTORY containing your config.xml file
    • The output of this command is the directory /tmp/kiwi.<random> where random is a random string
  2. Logical Extend: This stage is based on the previous “physical extend” and “creates” an operating system image. You can utilize the images.sh configuration script while creating the logical extend to clean-up your image or to perform additional configuration. This script is called at the beginning of the image creation process.
    • To “create” the logical extend enter: kiwi -c /path1 -d /path2
    • /path1 is the path to your previously prepared kiwi.<random> directory
    • /path2 is the desired “destination” path of the output of the command
    • The output of this command is the image file and the associated MD5 checksum
  3. Deployment: There are several ways to deploy the new image.
  • Netboot: ATFTP is used to deploy the newly created image via PXE. You can utilize KIWI to create a special kernel and initrd for the purpose of deploying a KIWI based image. You have the choice of loading the image into volatile RAM or onto non-volatile, persistent storage like flash memory or a hard drive. KIWI will check whether a KIWI image is installed on the target system. If the version installed on the target system is older than the one being served the image will be updated.
  • Locally Accessible Hard Disk: The image can be installed by dumping (dd) the image file on a previously created partition on this disk. To activate the system a boot manager like grub or lilo can be used.
  • Paravirtualized: In case of a paravirtualized target system like Xen, the image can be be installed by copying the image file on the target system. To activate the virtual system a configuration must be provided which points to the image in some way. One possibility is to use a loop mounted location.
  • Fully Virtualized: In case of a full virtualized target system like VMware the
    image represents a virtual disk as a file which can be “played” by the virtualization
    system.

While the KIWI Image System is under very active development, customers are realizing the value of this very exciting technology and deploying TODAY!

For more information check out the following websites:

Next Page »